


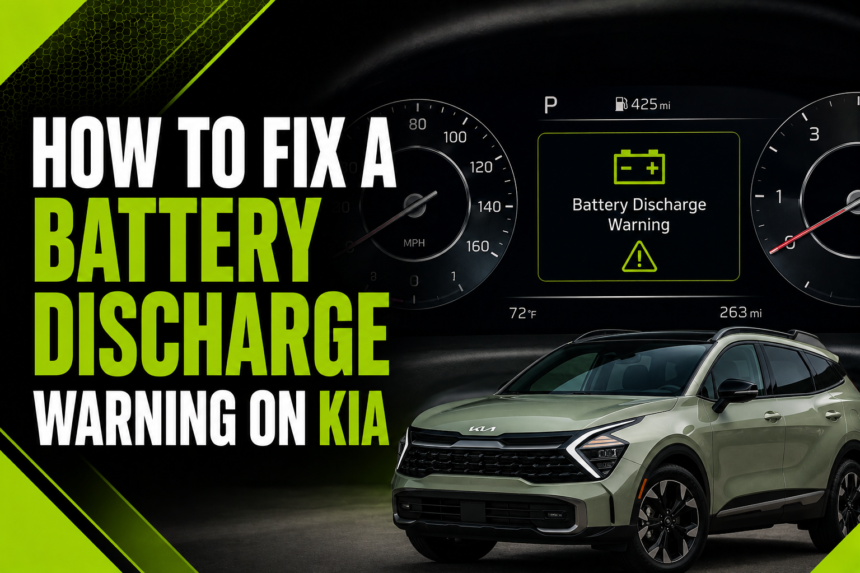
A battery discharge warning on your Kia dashboard is your car telling you that the battery is losing power faster than it is being recharged. This usually points to a problem with the alternator, battery, wiring, or a fuse in the charging circuit. Ignoring this warning can leave you stranded with a dead battery at the worst possible time.
- Understanding the Kia Charging System
- How the Battery, Alternator, and Voltage Regulator Work Together
- What Discharge Actually Means in This Context
- Common Kia Models Affected by This Warning
- Common Symptoms Alongside the Warning
- Top Causes of Battery Discharge Warning
- Loose or Corroded Battery Terminals
- Weak, Old, or Dying Battery
- Faulty Alternator
- Worn or Slipping Serpentine Belt
- Blown Fuse in the Charging Circuit
- Parasitic Electrical Drain
- Faulty Wiring or Bad Ground Connection
- Voltage Regulator Failure
- Step-by-Step Diagnostic Process
- Step 1: Visual Inspection of Battery and Cables
- Step 2: Testing Battery Voltage with a Multimeter
- Step 3: Checking Alternator Output
- Step 4: Inspecting the Serpentine Belt
- Step 5: Checking Fuses Related to the Charging System
- Step 6: Scanning for OBD-II Fault Codes
- Step 7: Testing for Parasitic Drain
- DIY Fixes You Can Try at Home
- Cleaning Battery Terminals
- Tightening Connections
- Replacing a Blown Fuse
- Jump-Starting Safely as a Temporary Fix
- When You Need Professional Help
- Alternator Replacement
- Voltage Regulator Repair
- Wiring or Harness Issues
- Choosing the Right Replacement Battery
- Preventive Maintenance Tips
- Cost Estimates
- Frequently Asked Questions
- Can I drive with a battery discharge warning on?
- How long does a Kia battery usually last?
- Does this warning mean I need a new battery immediately?
- Can extreme weather cause this warning?
- Will disconnecting the battery reset the warning?
- Conclusion
- Related Articles
The good news is that most causes behind this warning are easy to diagnose and, in many cases, simple enough to fix at home. In this guide, we will walk through every possible cause, how to test each part of the charging system, and when it makes more sense to visit a professional mechanic.
Understanding the Kia Charging System
Your Kia’s charging system depends on three main parts working together: the battery, the alternator, and the voltage regulator. When one part fails, the whole system struggles to keep the battery charged.
How the Battery, Alternator, and Voltage Regulator Work Together
The battery provides the initial power to start your engine, while the alternator takes over once the engine is running and recharges the battery. The voltage regulator controls how much electricity flows from the alternator to the battery, preventing overcharging or undercharging. If any one of these three fails, your Kia will display a discharge warning because the system can no longer balance power supply correctly.
What Discharge Actually Means in This Context
A “discharge” warning simply means your battery is using more power than it is receiving. This is different from a dead battery, since the battery itself might still be healthy but is not being topped up properly.
The warning is essentially an early alert asking you to check the charging system before the battery drains completely and leaves you with a car that won’t start.
Common Kia Models Affected by This Warning
This warning can appear on almost any Kia model, including the Sportage, Sorento, Forte, Optima, K5, Soul, and Rio. Older models with aging alternators or original batteries tend to show this warning more frequently, while newer models may display it due to a wiring fault or a software-related sensor glitch. Regardless of the model, the underlying causes and fixes remain largely the same across the Kia lineup.
Common Symptoms Alongside the Warning
The discharge warning rarely appears alone, and noticing these accompanying symptoms can help you understand how serious the issue is.
Dimming Headlights and Interior Lights
One of the earliest signs of a charging problem is headlights or interior lights that appear dimmer than usual, especially when idling or when multiple electrical accessories are turned on at once. This happens because the alternator is not supplying enough voltage to power all the electrical components smoothly.
Slow Engine Cranking
If your Kia takes longer than usual to start, or the engine cranks slowly before catching, this is a strong indicator that the battery is not holding enough charge. Slow cranking combined with a discharge warning almost always points toward a battery or alternator issue.
Electronics Glitching Randomly
You might notice your radio resetting, power windows moving slower than normal, or the air conditioning behaving inconsistently. These glitches occur because the electrical system is not receiving stable voltage, which directly affects how smoothly these components operate.
Top Causes of Battery Discharge Warning
Several different issues can trigger this warning, ranging from something as simple as a loose cable to something as serious as alternator failure.
Loose or Corroded Battery Terminals
Corrosion or a loose connection at the battery terminals interrupts the flow of electricity between the battery and the rest of the car. Over time, dirt and corrosion build up, creating resistance that prevents proper charging even if the alternator itself is functioning correctly.
Weak, Old, or Dying Battery
Batteries naturally degrade over time and lose their ability to hold a charge. A battery nearing the end of its lifespan will trigger a discharge warning even if the alternator is working perfectly, simply because it cannot retain the power being supplied to it.
Faulty Alternator
The alternator is often the main culprit behind a discharge warning. If the alternator’s internal components wear out or fail, it will stop generating enough electricity to charge the battery, causing the warning light to turn on almost immediately after starting the car.
Worn or Slipping Serpentine Belt
The serpentine belt drives the alternator, and if it becomes loose, cracked, or worn out, the alternator will not spin at the correct speed. This directly reduces the alternator’s charging output and can trigger the discharge warning intermittently, especially at idle.
Blown Fuse in the Charging Circuit
A single blown fuse related to the charging system can completely cut off communication or power between the battery and alternator. This is one of the easiest and cheapest fixes, but it is often overlooked during initial troubleshooting.
Parasitic Electrical Drain
Aftermarket accessories such as stereo systems, dash cams, or phone chargers left plugged in can silently drain your battery even when the car is off. A stuck relay or a malfunctioning interior light switch can cause the same problem.
Faulty Wiring or Bad Ground Connection
Damaged wiring or a poor ground connection interrupts the electrical path needed for proper charging. Rodent damage, wear from heat exposure, or accidental disconnection during repairs are common reasons behind this issue.
Voltage Regulator Failure
Although often built into the alternator on modern Kia models, a failing voltage regulator can cause overcharging or undercharging. This imbalance confuses the charging system and frequently results in a discharge warning appearing on the dashboard.
Step-by-Step Diagnostic Process
Before jumping to conclusions, it helps to follow a structured diagnostic process so you know exactly what part of the system is failing.
Step 1: Visual Inspection of Battery and Cables
Start by popping the hood and visually checking the battery terminals for corrosion, looseness, or visible damage to the cables. A flashlight can help you spot small cracks or white/blue corrosion buildup that is easy to miss otherwise.
Step 2: Testing Battery Voltage with a Multimeter
With the engine off, a healthy battery should read around 12.6 volts. Start the engine and check again; the reading should rise to somewhere between 13.7 and 14.7 volts, confirming that the alternator is charging the battery properly.
Step 3: Checking Alternator Output
If the voltage does not rise when the engine is running, the alternator is likely not charging correctly. Many auto parts stores offer free alternator testing, which can confirm whether the alternator needs to be repaired or replaced.
Step 4: Inspecting the Serpentine Belt
Check the belt for cracks, glazing, or looseness by pressing down on it firmly. A belt that flexes too much or shows visible wear should be replaced immediately, as it directly affects alternator performance.
Step 5: Checking Fuses Related to the Charging System
Locate the fuse box, usually under the hood or near the dashboard, and check the fuses linked to the charging system using the diagram printed on the fuse box cover. A blown fuse will often appear visibly burnt or broken inside.
Step 6: Scanning for OBD-II Fault Codes
Using an OBD-II scanner can reveal specific charging system fault codes stored in the car’s computer. These codes narrow down the exact component causing the issue, saving time compared to manual guesswork.
Step 7: Testing for Parasitic Drain
To check for a parasitic drain, disconnect the negative battery terminal and connect a multimeter in series between the terminal and the cable. A reading higher than 50 milliamps typically indicates something is drawing power even when the car is off.
DIY Fixes You Can Try at Home
Many causes behind this warning can be resolved without professional help, especially if caught early.
Cleaning Battery Terminals
Disconnect the terminals, clean them using a mixture of baking soda and water along with a wire brush, and dry them thoroughly before reconnecting. This simple step often resolves charging issues caused by corrosion buildup.
Tightening Connections
Sometimes the fix is as simple as tightening a loose terminal clamp or cable connection with a wrench. Loose connections can mimic more serious electrical problems, so this should always be checked first.
Replacing a Blown Fuse
If you find a blown fuse during inspection, replace it with one of the exact same amperage rating. Using the wrong fuse rating can damage other electrical components, so always match it precisely.
Jump-Starting Safely as a Temporary Fix
If your battery is completely drained, a jump start can get you moving temporarily, but it does not fix the underlying charging issue. Treat this as a short-term solution while you plan for a proper diagnosis.
When You Need Professional Help
Some repairs go beyond basic DIY fixes and require the tools and expertise of a trained technician.
Alternator Replacement
If testing confirms the alternator is faulty, replacement is usually the only reliable fix, since repairing internal alternator components is rarely cost-effective for most Kia owners.
Voltage Regulator Repair
Because the voltage regulator is often integrated into the alternator on newer Kia models, a professional diagnosis is important to determine whether the entire unit needs replacing or just the regulator component.
Wiring or Harness Issues
Diagnosing hidden wiring damage requires specialized tools and experience, since faulty wiring can be difficult to trace without proper equipment. A mechanic can pinpoint the exact break or short in the harness.
Choosing the Right Replacement Battery
Not every battery fits every Kia model correctly. A mechanic or dealership can help you select a battery with the correct cold cranking amps (CCA) rating and group size for your specific Kia model and climate.
Preventive Maintenance Tips
Preventing this warning from reappearing is often easier and cheaper than fixing it after it happens.
Routine battery testing every six months helps catch weakening batteries before they cause problems. Keeping terminals clean and corrosion-free extends both battery and alternator lifespan.
Avoiding excessive use of electronic accessories while the engine is off reduces unnecessary strain on the battery. Scheduling regular alternator and belt inspections during oil changes ensures early detection of wear. Most Kia batteries last between three and five years, so tracking your battery’s age helps you plan replacements proactively instead of reactively.
Cost Estimates
| Repair/Service | Estimated Cost Range |
| Battery Replacement | $100 – $250 |
| Alternator Replacement | $400 – $900 |
| Serpentine Belt Replacement | $75 – $200 |
| Diagnostic Fee (Dealership) | $100 – $150 |
| Diagnostic Fee (Independent Shop) | $50 – $100 |
Costs can vary depending on your Kia model, location, and whether you choose OEM or aftermarket parts.
Frequently Asked Questions
Can I drive with a battery discharge warning on?
It is not recommended, since your car could lose power unexpectedly. Short trips may be possible, but you should get it checked as soon as possible.
How long does a Kia battery usually last?
Most Kia batteries last between three and five years, depending on climate, driving habits, and battery quality.
Does this warning mean I need a new battery immediately?
Not always. The battery could still be healthy, but the alternator or another component may be failing to charge it properly.
Can extreme weather cause this warning?
Yes, extreme heat or cold can accelerate battery wear and reduce charging efficiency, making the warning more likely to appear.
Will disconnecting the battery reset the warning?
Disconnecting the battery may temporarily clear the warning, but it will return if the underlying charging issue is not fixed.
Conclusion
A battery discharge warning on your Kia is a clear signal that something in the charging system needs attention, whether it’s a simple corroded terminal or a failing alternator.
Following a structured diagnostic approach helps you identify the exact cause quickly, and many issues can be resolved through basic DIY fixes like cleaning terminals or replacing a fuse.
For more complex problems like alternator or wiring failures, professional help ensures the repair is done safely and correctly. Staying proactive with regular battery and charging system checks is the best way to avoid this warning from appearing again in the future.
Related Articles
What Is the Reserve Capacity of a Car Battery? Complete Guide
Are NAPA Batteries Good? Honest Review, Pros, Cons & Buying Guide
What Batteries Do Xbox Controllers Use? A Complete Guide
Battery Acid Explained: What It Is, How It Works, and Safety Tips