


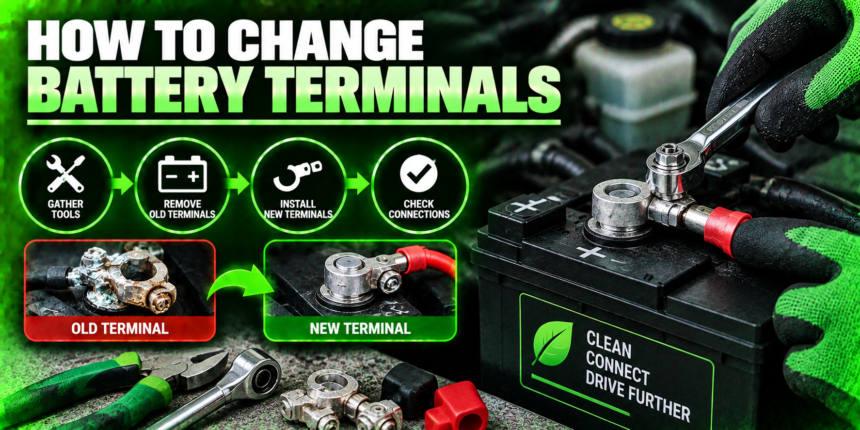
To change your car’s battery terminals, disconnect the negative cable first, then the positive. Take off or cut away the old terminals, clean the cable ends and posts, fit the new terminals, then reconnect in reverse: positive first, negative last. It is a job you can do at home in under an hour with basic tools and about $20 in parts.
The order is the part that matters most. Get the disconnect sequence right and this is a safe, simple fix. Get it wrong and you risk a spark, a blown fuse, or a jolt. Here is the whole process, done safely.
Why does the order matter so much?
Your battery’s negative terminal is connected to the car’s metal body, which acts as the ground for the whole electrical system. When you take the negative cable off first, you break that path. After that, even if your wrench slips and touches the car’s metal while you work on the positive side, nothing happens, because the circuit is already open.
Do it the other way around and there is real risk. With the negative still attached, a wrench that bridges the positive post and any metal part of the car completes a circuit instantly. That can throw sparks, weld your wrench to the metal, pop fuses, or even ignite the small amount of hydrogen gas a battery gives off. So the rule is simple and never changes: negative off first, positive on last.
One thing to know before you start: disconnecting the battery can reset your car’s clock, radio presets, and sometimes stored settings in the engine computer. On most cars this is a minor annoyance that sorts itself out after a short drive. If your vehicle is newer and you would rather not lose those settings, a cheap memory-saver tool that plugs into the accessory socket keeps power to the computer while the battery is disconnected. It is optional, not essential.
Remember the order: disconnect negative then positive; reconnect positive then negative. Negative is always the odd one out at each end of the job.
When do your terminals need replacing?
Not every dirty terminal needs replacing. If the metal is sound and just coated in grime, a clean-up is enough. You need new terminals when the metal itself has gone bad. Watch for these signs.

- Heavy corrosion that keeps coming back, or the white, blue, or green crust has eaten into the clamp itself.
- Cracks or a spread-open clamp that will not tighten firmly onto the post anymore.
- Slow or no cranking even with a good battery, since a bad terminal adds resistance and starves the starter of power.
- Flickering lights or electrical gremlins that trace back to a loose or resistant connection.
The stakes are higher than a slow start. Even minor hidden corrosion between the post and the clamp can cut alternator output and lower the voltage reaching the starter, which stresses the charging system and can lead to pricier failures down the line. Replacing a $20 terminal is cheap insurance against that.
What you’ll need?
Most of this is standard household or glovebox kit. The only thing you may have to buy is the terminals themselves, and possibly a stripping tool if your cables are the crimped type.
| What you need | Why |
| Wrench or socket set (often 10mm) | Loosens the terminal bolts |
| Safety glasses and gloves | Battery acid and corrosion are harmful |
| Wire brush or terminal cleaner | Cleans corrosion off the posts and cable |
| New terminals ($10 to $30) | Matched to your post or side-post type |
| Wire cutters and stripper | Only if the old terminal is crimped to the cable |
| Terminal grease or petroleum jelly | Protects the new connection from corrosion |
| Baking soda and water | Neutralizes acid on stubborn corrosion |
Buy terminals that match your battery. Most cars use top-post terminals that clamp over a round post, but some, especially GM vehicles, use side-post terminals that bolt in from the side. Take a photo of your old ones or bring them to the parts store to be sure you get the right style.
How to change battery terminals, step by step
Park on level ground, switch the engine off, and take the key out. Put on your gloves and glasses before you touch anything. Then work through these in order.
- Disconnect the negative terminal. Find the negative post, marked with a minus sign or a black cover. Loosen its bolt with your wrench, wiggle the cable off the post, and tuck it well to the side where it cannot spring back and touch the post.
- Disconnect the positive terminal. Now do the same on the positive side, marked with a plus sign or a red cover. Move that cable aside too, keeping it clear of any metal.
- Remove the old terminals. If the terminal is a bolt-on clamp, undo the bolt and lift it off the cable. If it is crimped or moulded onto the cable end, cut it off with wire cutters as close to the old terminal as possible, then strip about half an inch of insulation to expose clean copper.
- Clean everything. Scrub the battery posts and the exposed cable ends with a wire brush until the metal is bright. For stubborn corrosion, dab on a paste of baking soda and water, let it fizz for a minute, scrub again, then wipe dry. Clean metal is what makes a good connection. While you are there, check the cable strands: if corrosion has crept up inside the cable and turned the copper green and brittle, trim back to clean wire, and if the damage runs too far up, the cable itself needs replacing, not just the terminal.
- Fit the new terminals. For a bolt-on type, slide the clamp onto the cable and tighten its bolt. For a compression type, push the stripped cable into the terminal body and tighten it down, leaving only about an eighth of an inch of bare wire outside the clamp and no insulation caught inside it. If your new terminals came with heat-shrink tubing, slide it over the joint and warm it to seal out moisture before you reconnect.
- Reconnect positive first. Slide the positive terminal onto its post and tighten it snug. It should not twist by hand once tight, but do not force it so hard that you risk cracking the post.
- Reconnect negative last. Fit the negative terminal onto its post and tighten it the same way. You may see a tiny spark as it seats, which is normal.
- Check the fit. Give each terminal a gentle wiggle. Both should be firm with no movement. A loose terminal causes the very problems you just fixed.
That is the whole job. From here it is just a quick test and a little protection to make it last.
After the swap: test and protect
Start the engine to confirm everything works. It should crank normally, and your lights and electronics should behave as usual. If cranking is still slow or warning lights appear, recheck that both terminals are tight and making clean contact.
Once you are happy, coat both terminals and posts with a thin layer of terminal grease or plain petroleum jelly. This seals out the moisture and acid fumes that cause corrosion in the first place, and it is the single best thing you can do to keep your new terminals clean for years. Make a habit of glancing at the terminals whenever you check your oil, so you catch any buildup early.
When should you leave it to a mechanic?
This is a beginner-friendly job, but a few situations are worth handing off. If the battery posts themselves are cracked, badly pitted, or crumbling, the battery may need replacing rather than just the terminals. If the corrosion is so severe that you cannot free the old terminal without risking damage to the cable, a shop has puller tools made for it.
It is also fine to ask for help if the layout under your hood is cramped or you are simply not confident. There is no shame in it, and a mismade connection can harm sensitive electronics. For a manufacturer-backed walkthrough with photos, AutoZone’s terminal replacement guide covers the same steps and is a good second reference before you begin.
Conclusion
Changing battery terminals is a straightforward job once you respect the order: negative off first, positive on last. Gather your tools, confirm the terminals actually need replacing, then disconnect, clean, fit the new ends, reconnect in reverse, and protect the connection with grease. Done carefully it takes under an hour and about $20, and it can save you from slow starts, electrical faults, and far costlier repairs later.
Frequently asked questions
Which battery terminal do I disconnect first? Always the negative one first, then the positive. This breaks the circuit so a slipped wrench cannot spark against the car’s metal. When reconnecting, reverse it: positive first, negative last.
How much does it cost to replace battery terminals? The terminals themselves usually cost $10 to $30, and most tools are ones you likely own. Doing it yourself keeps the whole job under about $30.
Can I replace just one terminal? Yes, if only one is damaged you can replace that one alone. Replacing both at once is optional but gives you two clean, reliable connections and saves a repeat job later.
Do I need to cut the cable to change a terminal? Only if the old terminal is crimped or moulded onto the cable. Bolt-on clamps simply unbolt and lift off. Check which type you have before reaching for wire cutters.
How long does it take to change battery terminals? For most people it is a 30 to 60 minute job with basic tools. Corroded or hard-to-reach terminals take longer, but no advanced skills are needed.
Related Articles
How to Extend the Life of a Hybrid Car Battery?
How to Hook Up a Solar Panel to a Battery?
How to Charge a 6 Volt Battery Safely?
Can a Battery Be Too Dead to Jump? When a Jump Works and When It Won’t